- This tutorial will show you how to make a fascinator with materials you can easily purchase and/or may have at home. I'll use classic millinery techniques with a few "new school" bits mixed in for fun. Back when I was getting started I didn't want to spend a lot of money on fancy gear and mail order a bunch of expensive things in case I decided this was something I didn't want to do. I'm having a lot of fun making fascinators using this technique, and thought I'd share.
Here are the materials you need to get started:
You'll need:
- Two pieces of buckram. Mine were about 10" square, but you may vary the size depending on your block. I purchased this buckram at Hancock Fabrics. It's not high-grade millinery stuff, but we compensate for that by using two pieces.
- One piece of string long enough to go around the block several times (or tacks and a tack hammer, depending on what you use for a block)
- One spray bottle with water.
- One piece of cling wrap.
- Your block. I used the wooden lid from a glass jar meant to hold pasta.I paid a buck at the thrift store. I've also used salad bowls. As you progress with your technique you'll discover you can use all sorts of different objects to get different shapes for hat bases.
Cover the block with cling wrap. This protects the block from the sizing in the buckram (so it doesn't get sticky) and protects the block from any dirt that may be on the block. And yes, it helps keep your block clean.
Next, you'll lay down a piece of buckram and spray it with water. You want it a little tacky but not soaked. Then, lay the second piece cross-grain at a 45-degree angle. Spray the new piece. It will look something like this:
Lay the block face down on the buckram and wrap it up like so:
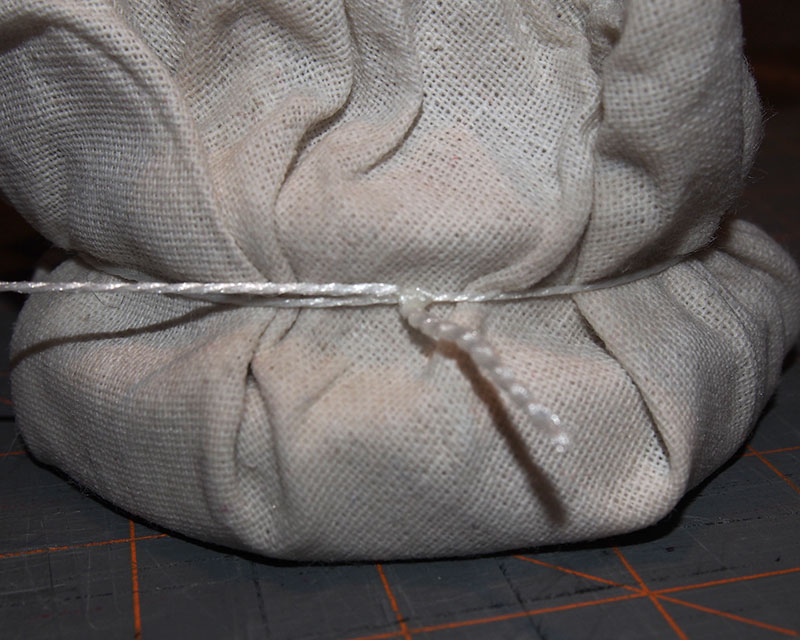
Now tie the string and pull it tight so it fits snug against the smaller part of the block. (The place where you tie - or tack - will vary depending on the block you use.)
Now comes the sticky part. You'll pull the string as tight as you can, wrapping it around a few times while you pull as much slack out of the buckram as you can. You want it to be as smooth as possible.
When you're done, you'll cut the excess off so you have a neat little package. Let it dry. Depending on the climate and how much water you used, it'll take anywhere from half an hour to several hours to dry. You don't have to worry about the bits around the rope - and above that - getting dry. You won't be using those.
When you're done, you'll cut the excess off so you have a neat little package. Let it dry. Depending on the climate and how much water you used, it'll take anywhere from half an hour to several hours to dry. You don't have to worry about the bits around the rope - and above that - getting dry. You won't be using those.