Tea Light Flower, Part 1
Dress up your outfit with a lighted flower! This is an easy project that uses hot glue (or you can use another adhesive good for plastic), and requires no soldering.
Read through all of the steps before you attempt this project. If you use a different flower (or tea light) than what you see pictured, you may want to make some adjustments.
Gather your supplies.
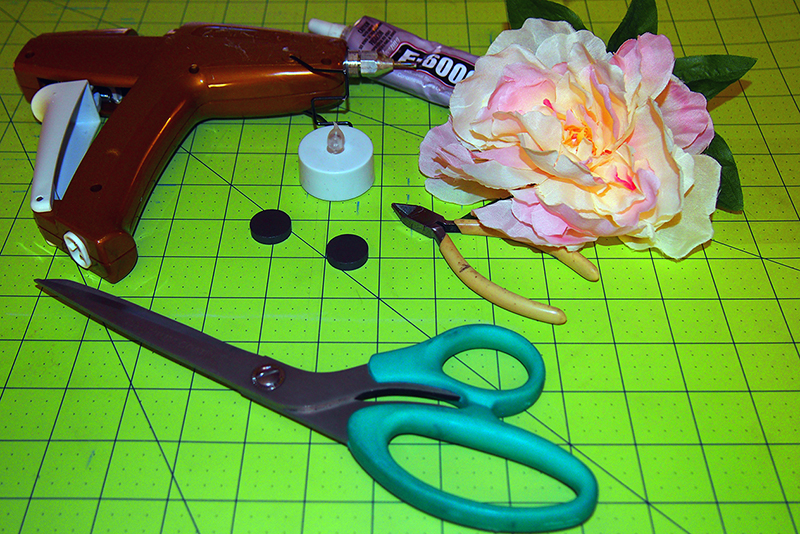
You'll need: - Silk flower with plenty of petals. I used one from a rose bush purchased at a local craft store.
- One (1) dollar store tea light. Be sure to get one that has the plastic "flame" instead of one that has a "wick. Those are generally less expensive anyway, so a win for the wallet!
- Two or three magnets, if you plan to use one on a garment or hat. (A 3/4" diameter magnet will just fit on the battery cover) I used ceramic hobby magnets. Depending on the final use, you may need stronger magnets. Don't be afraid to experiment. (If you plan to use it as a household decoration, you may disregard the instructions that involve magnets, or you may choose to use one in order to attach the flower to a metal surface.)
Tools: - Scissors
- Small diagonal pliers
- Glue gun and glue (or other adhesive)
- Heavy duty adhesive such as E-600 or epoxy. (If you're not going to attach a magnet, you won't need this)
To make the flower:
1.Take the tea light apart. Be sure to keep the assembly with the switch and light in place.
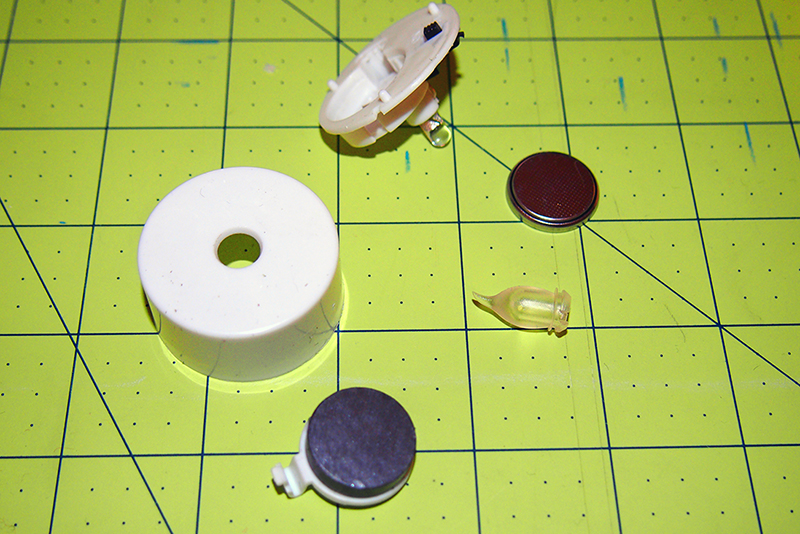
2. Attach one magnet to the outside of the battery cover following the directions on the adhesive.
3. Remove the "flame" and cut it apart just above the second ring.
4. Re-assemble the tea light and test that it still works. If not, that means you either have the battery in upside-down or one of the leads on the LED came loose. One lead folds under the battery and the other threads through a hole at the end of the switch. Use care as the leads are fragile and could snap off.
We'll continue this in part 2.
Filed under: Tutorials Accessories
2/4/2016 9:21:00 AM
|